Chapter 6.1 Database Setup - Creating Database server in RDS
*13 steps · Created Aug 20, 2026 ·
A Database server is physical disk which stores a database.so in order to make a database and connect to our app we must make a physical RDS server which can hold the database inside it.
Step 01: Log in AWS and Search for RDS

Step 02: Click link "Create"
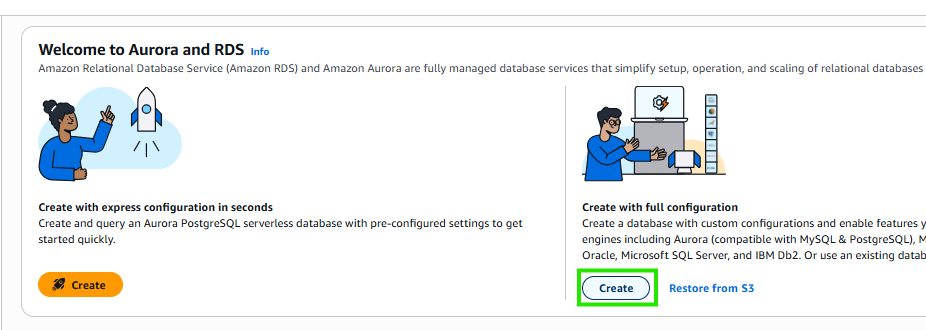
Step 03: Select the Kind of database server you want to make

Step 04: Click Free Tier RDS

Step 05: Name Your Database Server

Step 06: Click Self managed
We are here setting up password for Database Server. We choose self managed to avoid unnecessary complications with using a password manager. (obviously given you can remember your database server password)

Step 07: Type and confirm Master password
since we chose to set our password ourselves, we have to make a password obviously

Step 08 (optional): Click Password and IAM database authentication
if you have IAM user/role then you can select this option to directly log in by your IAM user/role along with Database password. This gives us multiple ways to access our DB server. Since we have made password also, this is totally optional

Step 09: Select VPC
- A VPC is a private ip address range which identifies your newly created machine inside AWS network using its IP address.
- One default VPC is already made in AWS and if you accidentally deleted it you can create one using this guide - [[Chapter 4 Making a default vpc]] or use the option "create new VPC"

Step 10: Set Public Access to 'Yes'
This in short means 'do you want non-aws things to be able to connect to this RDS?' so
- app on your laptop -> public access NO -> your app cant connect to Database
- app on your laptop -> public access YES -> your app can connect to database
- app on AWS -> public access NO -> your app can connect to Database (Coz app is also in AWS)

Step 11: Select Security Group
Security Group has security rules. This tells AWS which incoming connections and connection types can be used to connect to a machine (RDS Server in our current case). eg.
- allow -> http connections from 192.168.2.6 (example)
- allow tcp connections from 192.243.54.3 (example)
- dont allow from any other ip address
This is just a Security Group, Security Group has security Rules attached to it
unfortunately we cant configure those rules right now so we will do it after creating DB Server

Step 11: Click No preference in Availability zone
Simply means which AWS regions can connect to it. dont bother too much here

Step 12: Click Create database

Step 13: Your RDS is created

Step 14: Configuring Security Group
RDS Server is created but it can only be accessed by apps inside the AWS. to configure it to accept any connections from outside internet we must configure the security rules that we made in step 11
so, First Click your database

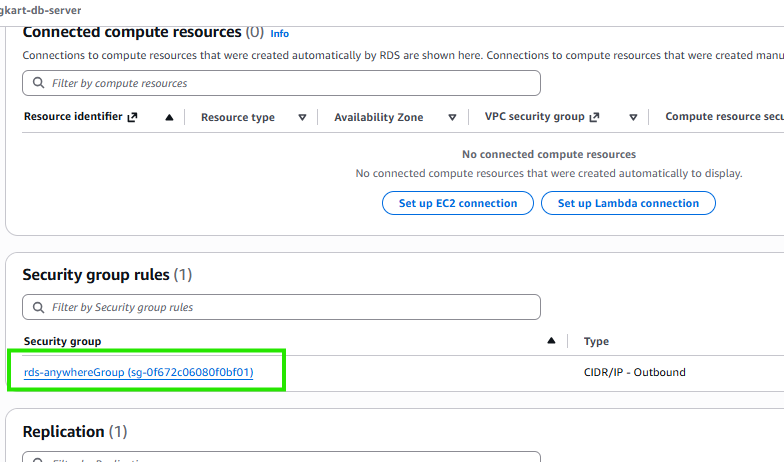
Step 14.1: Go to Security group section of RDS
Scroll down in Connectivity and Security to find Security Group Rule, Inside click on your Security Group
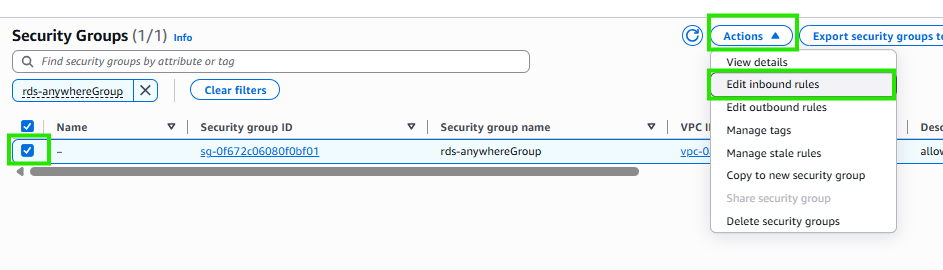
Step 14.2: Open Security Group and Click edit inbound rules
you will come inside Security Groups Page, with your Security group already showing, select it, click actions -> Edit inbound rules. Here in our specific case we will add rules for our security group that is attached to our RDS to allow RDS be connected from anywhere by any IP Address
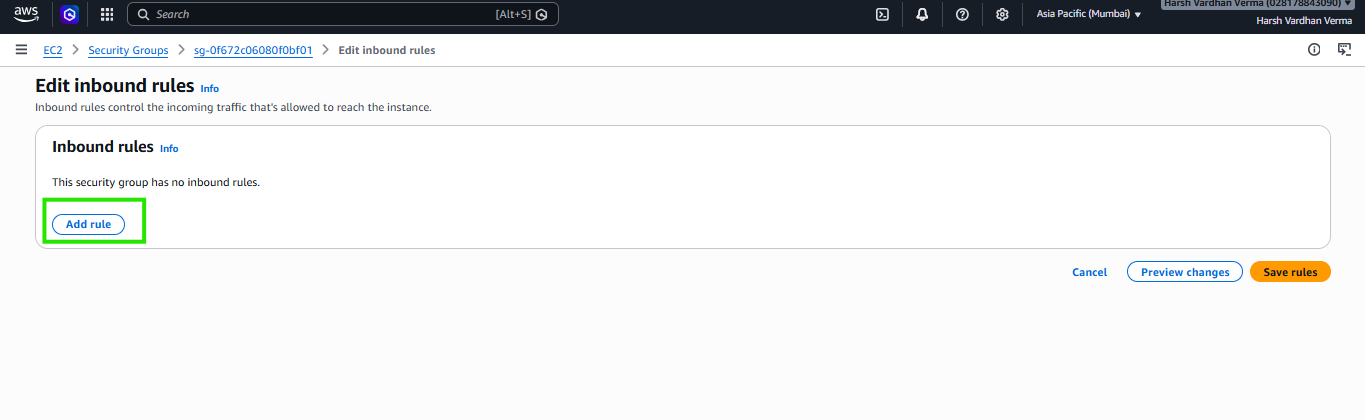
Step 14.2: Add a new rule
Click add rule
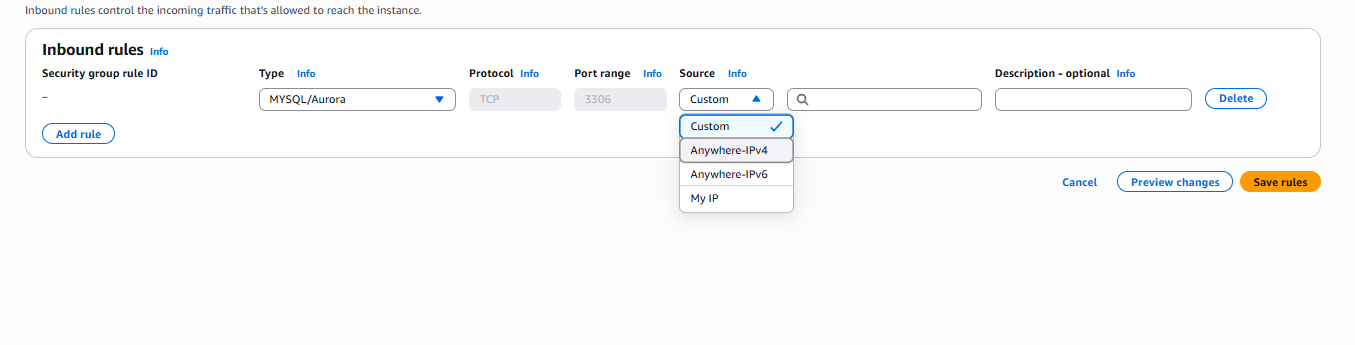
add a new rule to allow all connections from any IP Address. (if you only want your specific ip address to connect to RDS, click custom and then type the address next to it) here is config i used
- type - MySQL/Aurora
- Source - Anywhere-IPv4
Similarly make another rule for all ipv6 connections and your final screen should look like this
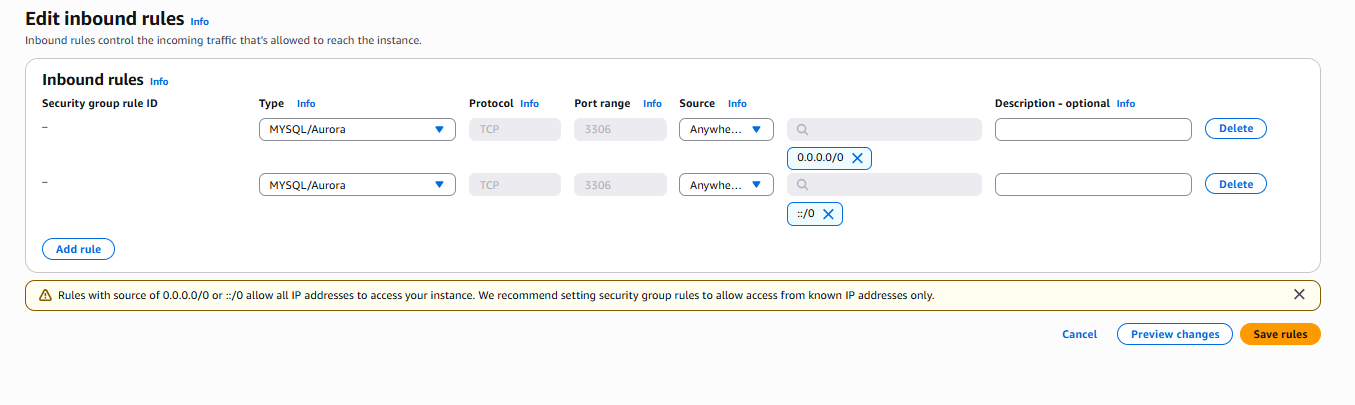
Click Save rules and this will modify your security group. This in turn will let your RDS connect from anywhere outside AWS.
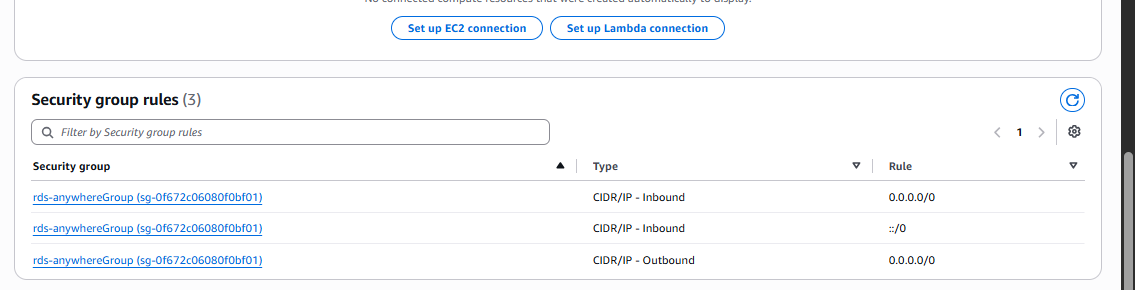
Step 14.3: Verify in RDS that our new rules reflect.
if you now go to your RDS and check security groups again you will see it with new rules this time.