Creating a GitHub Repo
hashcomics😋
1 / 4
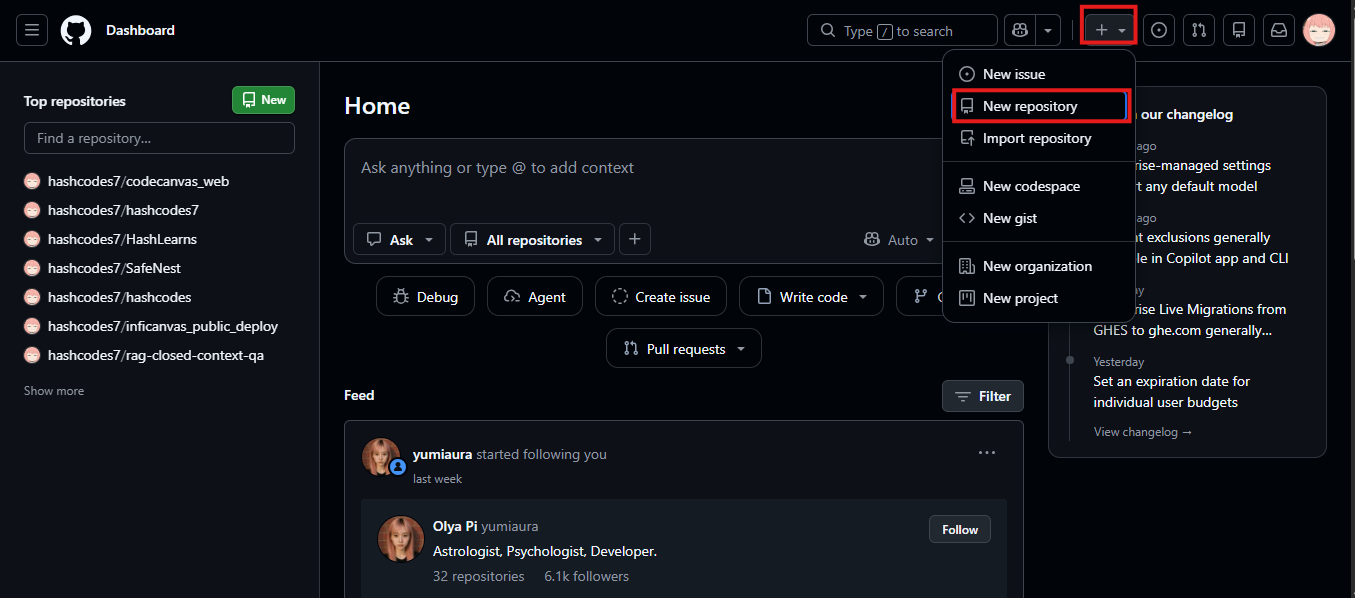
1. Click on + Dropdown and Select New Repo option
-
"1. Click on + Dropdown and Select New Repo option",
-
"2. Give name to your new repo",
-
"3. Click Create Button",
-
"4. Click Green Code button and copy the remotegit repo url"
Once done you will have your remote empty git repo ready to accept git which you will send from your normal system.
-
To attach the git repo to your project, use -
git remote add origin <Github Repo URL'
And here replace the url with your github repo's url
Now add all folders to staging and commit them
git add .
git commit -m "Initial commit"
Set up a Git Repo branch on which you will push
we will create a new branch named main, you can choose your name
git branch -M main
Push into newly created branch
git push -u origin main
Thats it, your new git repo is made.
(Summery) Entire flow is somewhat like this for a new repo -
mkdir my-project
cd my-project
git init
git config user.name "Your Name"
git config user.email "you@example.com"
then make a Git Repo , copy its URL and then run below commands (just change the repo url here)
git remote add origin https://github.com/USERNAME/Whatever_your_repo_url_is.git
git remote -v
git status
git add .
git commit -m "Initial commit"
git branch -M main
git push -u origin main
For Every updated code just do
git add .
git commit -m "your update msg"
git push -u origin main